This gluten free apple pie recipe has a perfectly flaky, crispy crust and a tender, sweet apple filling that is not sticky or syrupy. Perfect on its own or with a scoop of vanilla ice cream on top!
If you're looking for the best homemade apple pie that is gluten free and not overly sweet, you've come to the right place.
I'm not usually a big fruit pie fan. I had a friend once who said, "fruit takes up the space where chocolate could be," and I couldn't agree more.
But somehow, I'm sold on this gluten free apple pie recipe. The crust tastes like a flaky biscuit, the filling isn't syrupy, and it has just the right balance of sweetness. Warmed up, it makes the perfect dessert.
You'll see a few different ingredients in this recipe - don't shy away! Always try to learn new things. I've provided info in the Recipe Notes on how to make substitutions if you don't have the listed ingredient, so you should still be able to make it with what you have on hand.
And maybe you learn about a new ingredient you want to try in the future - like, date sugar?
Date sugar vs. brown sugar and refined sugar
Traditional apple pie recipes usually include brown sugar. Typically, I would substitute coconut sugar for brown sugar. However, in this gluten free apple pie recipe, I've subbed date sugar from PurDate in place of both brown sugar and regular refined sugar.
Date sugar is made from ground up dates. It has a low glycemic index, so it doesn't induce the unwanted sugar crash.
And I love everything this brand stands for - PurDate is made in Tunisia using locally sourced dates and dried with the natural heat of the Sahara sun, keeping environmental impact to a minimum.
They employ locals with full time jobs, and help to empower women. All things I can get behind!
I was also pleasantly surprised at the sweetness level - it's not nearly as sweet as refined sugar.
Date sugar is subbed for brown sugar in a 1:1 ratio and refined sugar in a 1:1:3 ratio - so you would need 1 ⅓ cups of date sugar for every 1 cup of refined sugar when subbing in a recipe.
How to make this gluten free apple pie recipe
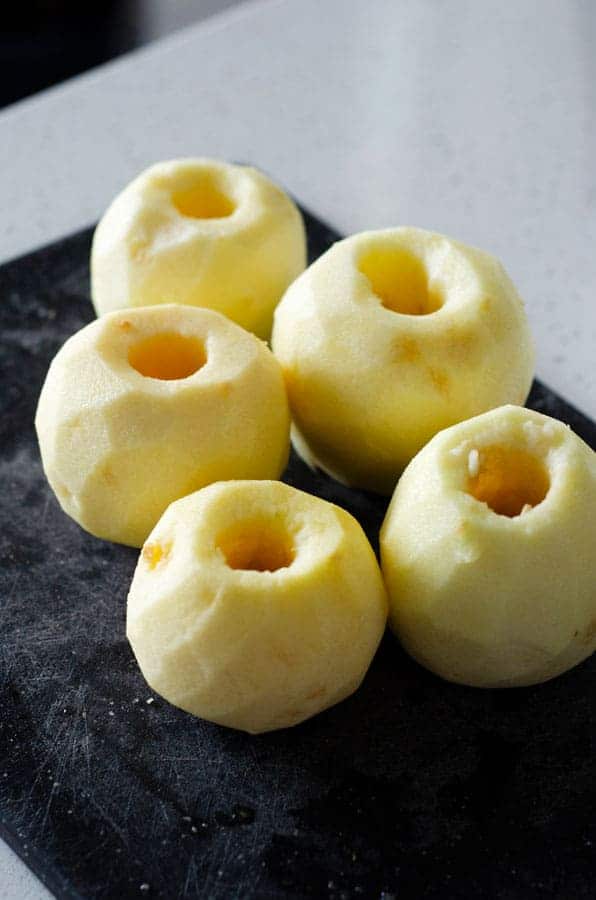
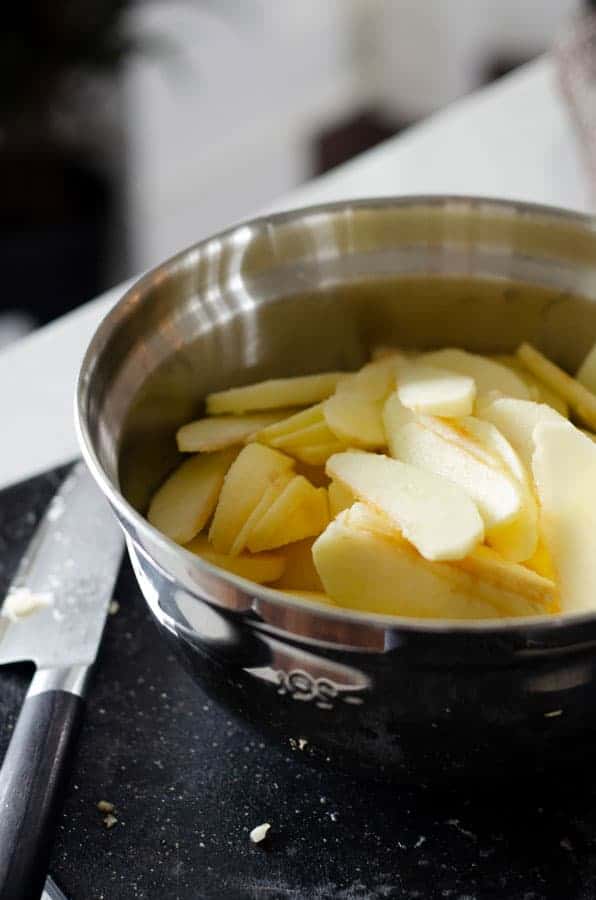
Core and peel your apples. They don't need to be pretty, they just need to be free of skin and stems and seeds.
I recommend using a sweeter variety of apples here rather than tart apples. The date sugar is less sweet, the crust is savory and salty, and the pie overall is not your traditional sticky-sweet apple pie.
By using a sweeter, firmer variety such as Honeycrisp, Fuji, or Gala, they carry a bit more sweetness on their own and won't turn into total mush in the pie when they are baked.
Thinly slice the apples. Put them all in a bowl, toss with a teaspoon of lemon juice to keep them from browning, then set aside while we make our spice mixture.
Combine all sugar and spices. Once they're all in the bowl, give them a good stir to mix them up first.
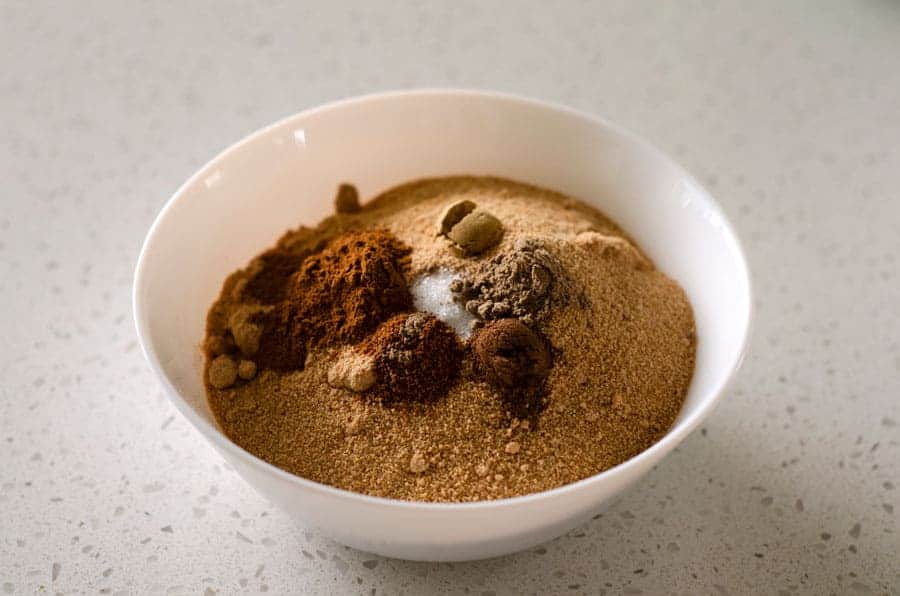
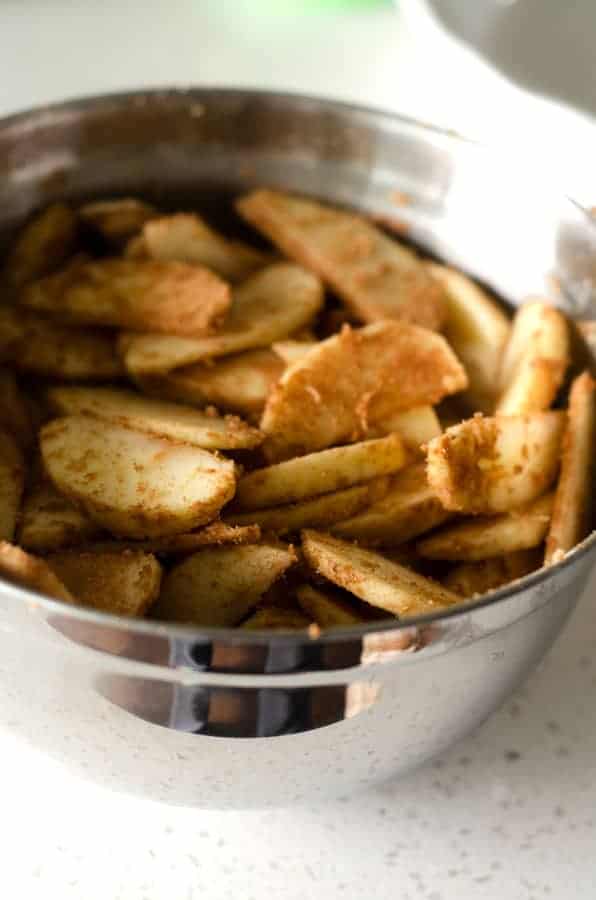
Coat the apples. Sprinkle the mixture over the apples, then toss gently to coat. Once the moisture from the apples hits the sugar, it's going to start to clump a bit. This is ok, just toss and coat as best as you can.
Then, set the bowl of apple slices aside to rest at room temperature while we work on our pie crust.
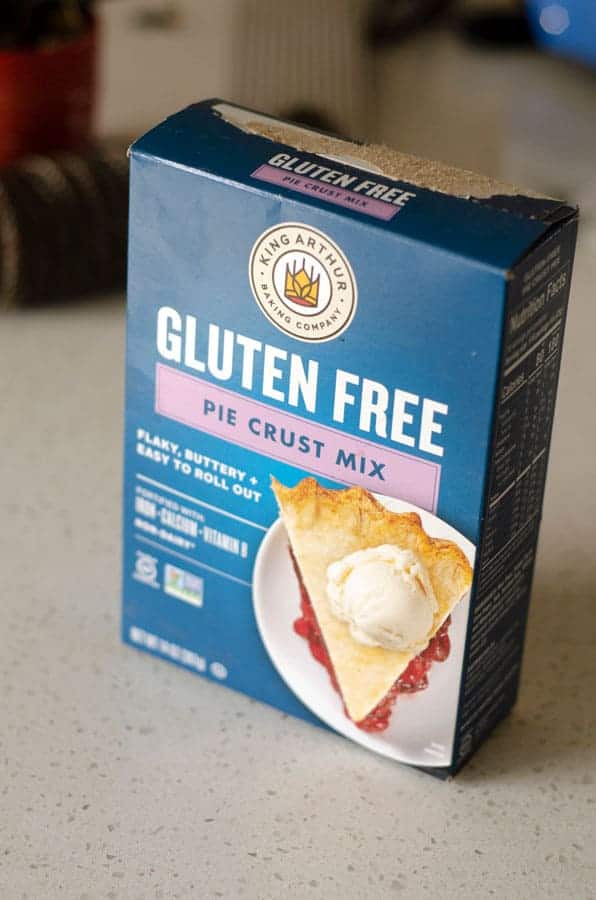
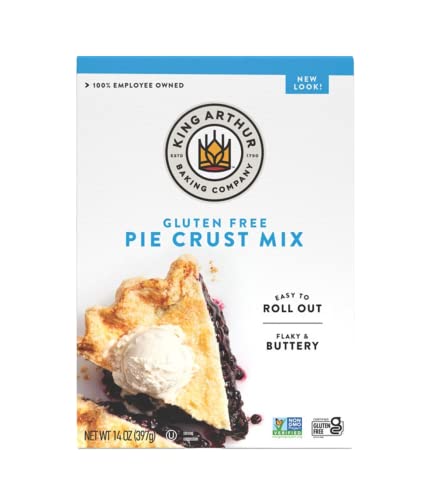
For this gluten free apple pie recipe, I used the King Arthur Gluten Free Pie Crust Mix, because I am not a baker. I am many things - a mom, a wife, a business owner, a pretty dang good cook, but when it comes to things like pie crust, I am out of my element. (As we will see soon.)
My whole family loved this crust. I struggled with the dough, but I'm pretty sure that was user error and not King Arthur's fault. The crust came out flaky and crispy on the outside, and tender on the inside.
It reheated well, and it was salty like a biscuit, which was a perfect compliment to the sweet apples.
Since I'm a big promoter of reading your ingredients list, here's what's in it:
Rice flour
Potato starch
Cane sugar
Salt
Xanthan gum (used for thickening)
Vitamin and mineral blend
Not too shabby! It's short, all are recognizable and pronounceable, and it keeps it gluten free. If you're someone who does a lot of gluten free baking, you might notice there aren't other traditional gluten free flours in here like almond flour, tapioca starch, and similar.
This is likely because of the consistency needed for the pie crust - they need it to have lots of starch (potato!) to make sure it gets crispy and can still hold the same pie crust consistency.
When you're ready to make it, this gluten-free pie crust uses three ingredients - the mix, butter, and water. Your butter has to be cold, straight out of the fridge, so make sure you leave it chilled until you're ready for it.
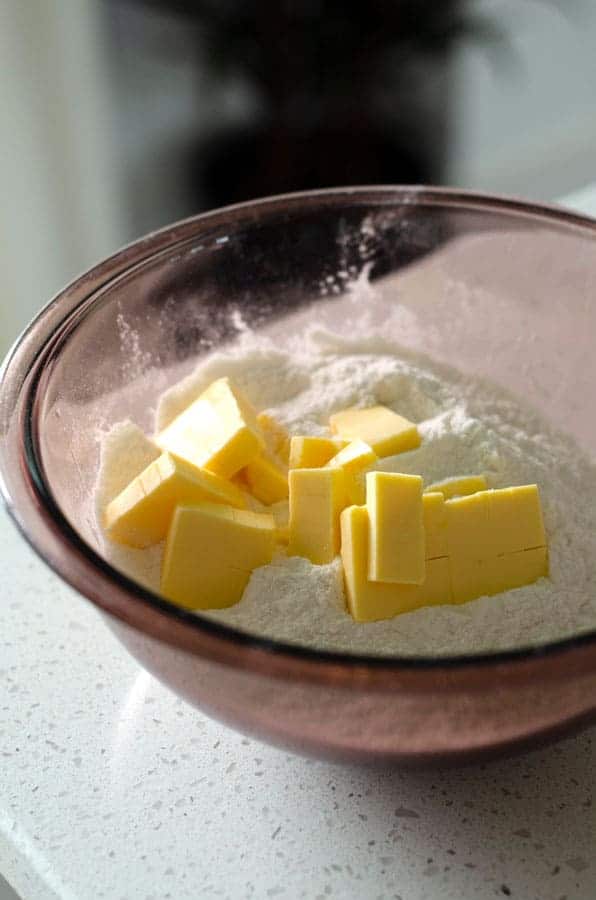
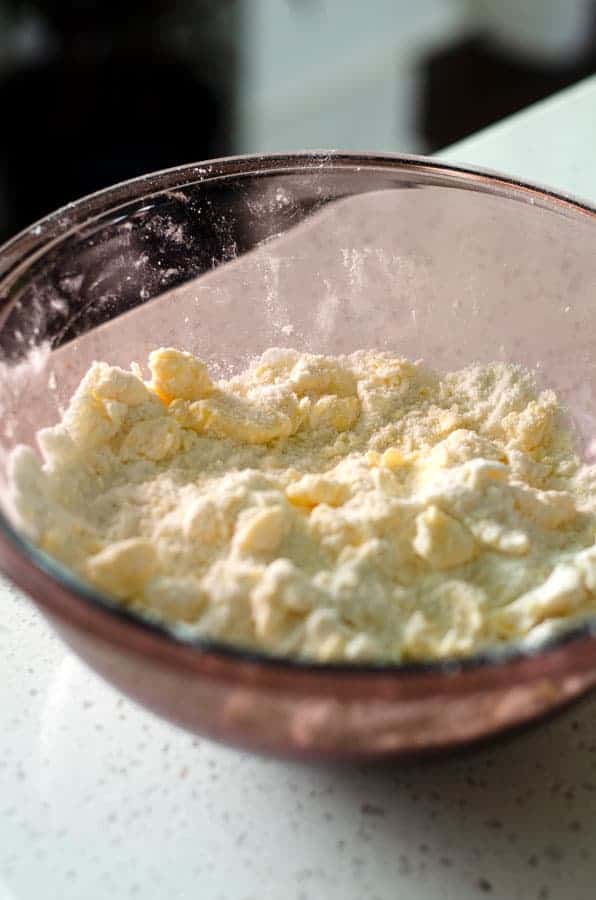
Add your pie crust mix to a large bowl, then grab your butter. Take it out of the fridge, cut into cubes, and work half of it in.
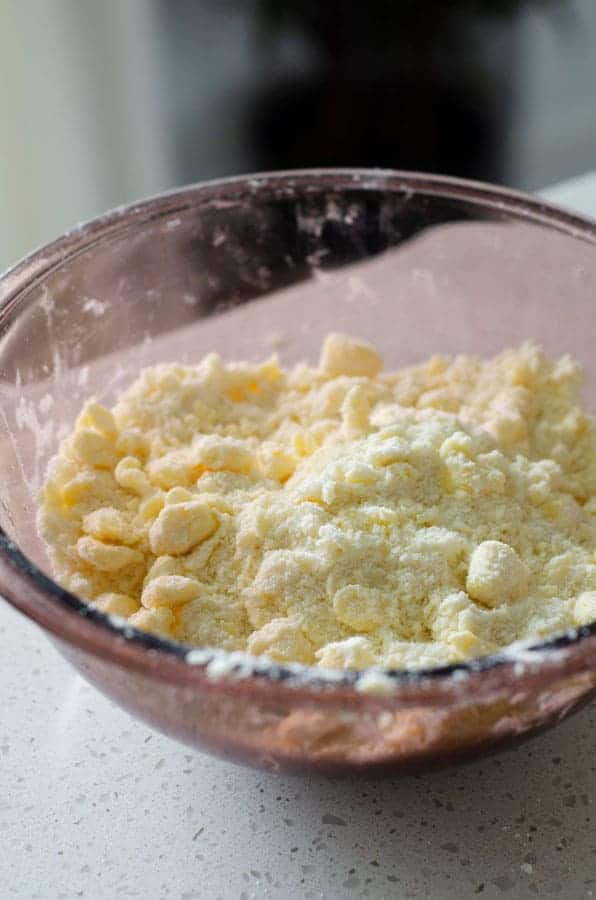
Then work the second half in. You'll have a buttery, crumbly, mix. This is good! You want it to have small crumbles of butter throughout.
I worked mine with my hands, gently, and quickly. I'm sure many bakers would frown upon that because I am melting the butter, but remember, I am not a baker, so it's ok. I can do what I want.
I imagine some might have used their food processor with a dough hook. I just got in there with my hands and did the best I could.
From there, add your water and form a dough. You might not need as much water as I did, or you might need more (I think I could have used a bit more water, as we will see soon.)
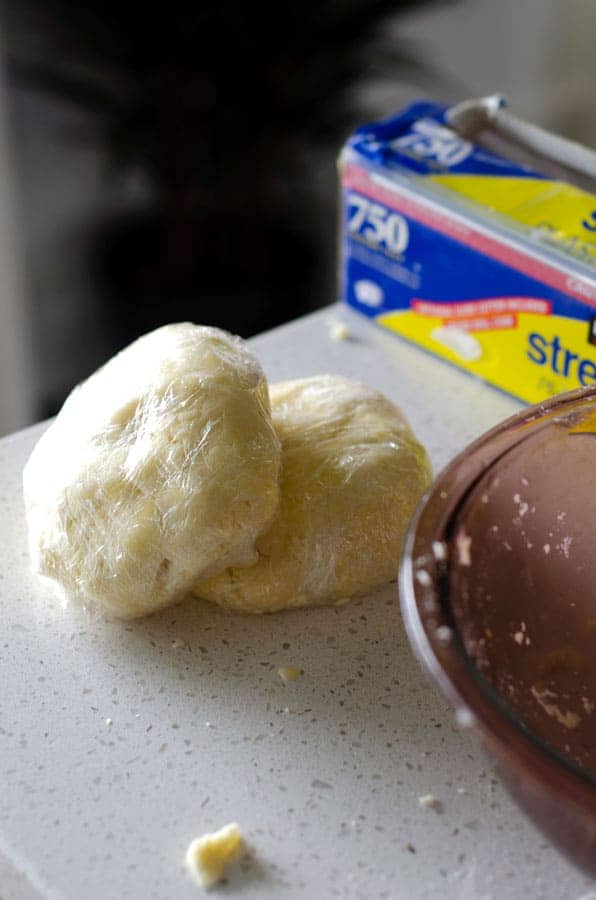
Wrap and refrigerate. This step is non-negotiable, unfortunately. That butter got a little warm when working with it at room temperature, so we've got to firm up the dough so we can work with it (or at least try). Divide the dough in two, making one ball a bit larger than the other (bottom vs. top). Press into a disc, wrap in plastic wrap, and pop into the fridge for 15 minutes.
Normally I hate recipes that make you wait. For this one, I didn't mind, because by this point my kitchen was a hot mess, and I was out of counter space.
I used the 15 minutes to put away all my spice bottles, wash dishes, bowls, and measuring spoons, and generally clean the counter.
I was glad I did this, because the next step involves rolling out the dough, and I needed that clean and empty counter space to do it.
Roll out your pie dough. Now remember...not a baker. I did the best I could, but this is shortcut baking. We're here for the flavor and not here to judge your (or my) pie crust skills.
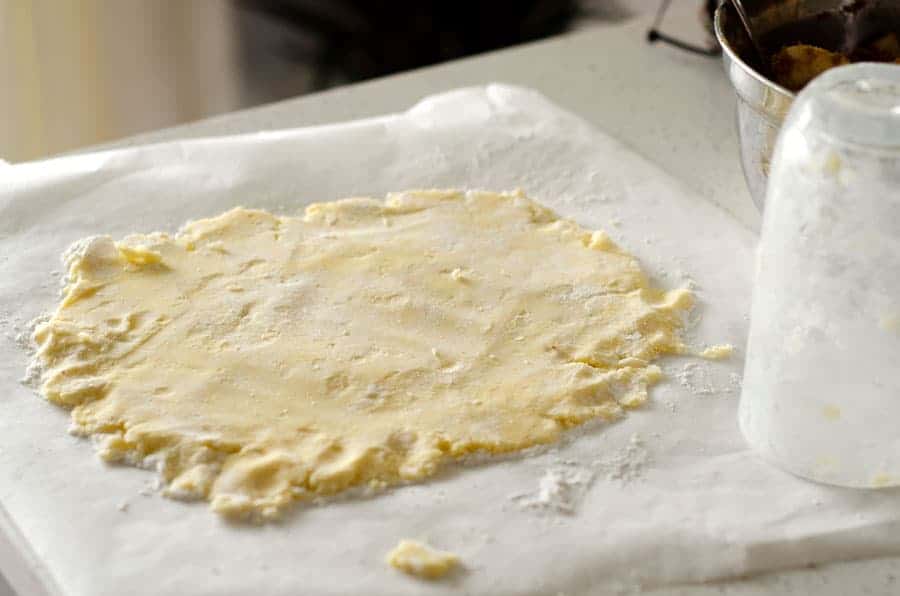
I don't honestly even own a rolling pin. I used a kitchen glass to roll it out as best as I could on a piece of parchment paper. You'll need some extra gluten free flour for dusting to keep it from sticking to anything.
I used tapioca flour, but you can use any finely ground gluten free flour successfully. (If you're not sure which flours are gluten free, you can check out this post about flour alternatives!)
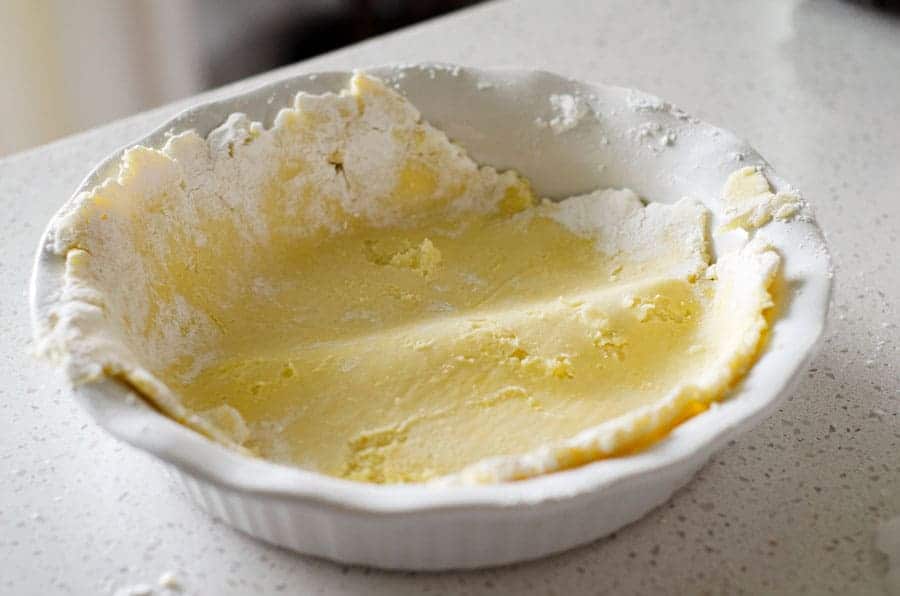
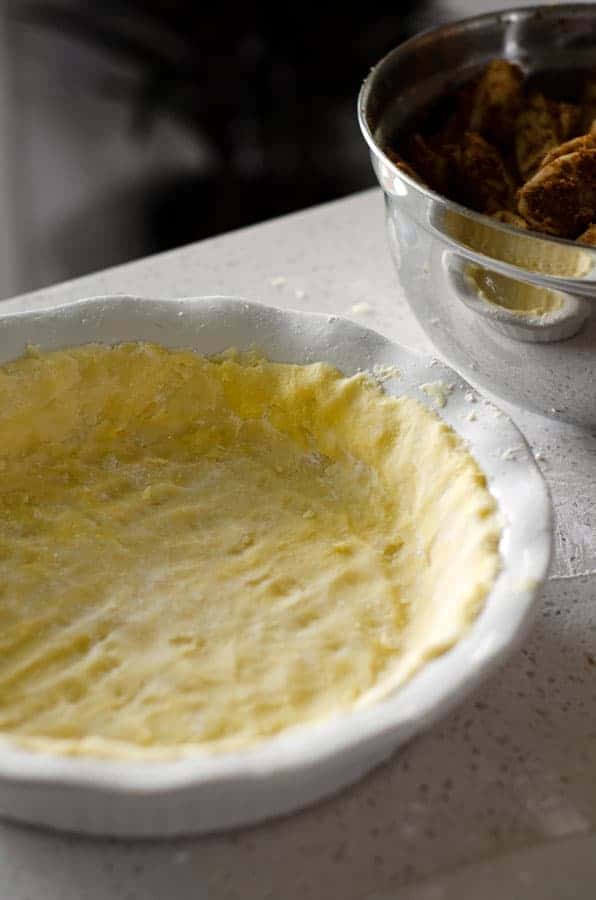
Once I had it mostly rolled out (clearly not perfect) I flipped the parchment over onto the pie pan. Then I used my fingers to press the crust into the pie pan.
Beautiful? No. Did it matter? No. It's getting covered up with apples.
This pie plate I used is pretty deep, so it didn't reach to the top, which is ok. If you have a regular depth pie pan, it should come up to the edge. Feel free to trim the edge and press with fork tines if you want it pretty.
I did not experiment with using a tart pan for this gluten-free apple pie recipe. If you're not familiar, a tart pan has a drop bottom - so you can essentially slide the outside edge off and be left with the pie on a round metal sheet, like in this gluten free fruit tart recipe.
If you wanted to use a pre-made pie shell instead for this recipe, they do sell gluten-free ones. They're not super easy to find, but I did see one at Publix, so you may be able to find one at a local grocery store.
Note: If you do use a pre-made pie shell, you may want to just cover the edge of the crust with a bit of aluminum foil before baking to keep it from burning. Those tend to be thinner and bake quicker than the middle of the pie, so the foil just protects it from getting over cooked.
Add your apple pie filling. Your apples will have some added moisture by now, and your apple filling mixture should look something like this:
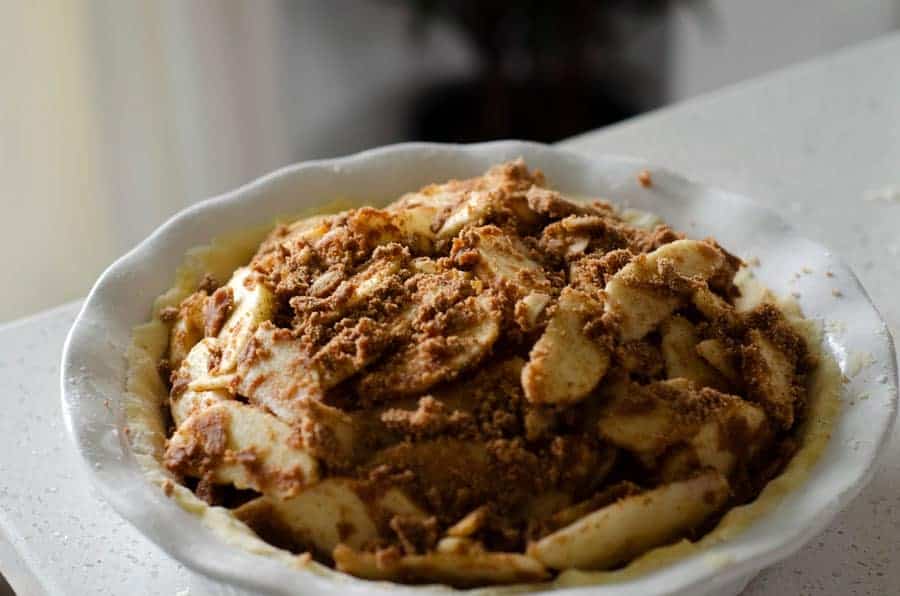
This is not a traditional syrupy apple pie.
You don't need to use any thickeners or stabilizers like xanthan gum in this recipe, as the filling does not have a liquid component to it, so there's nothing to thicken.
We're working with all natural ingredients and a natural date sugar, which results in a different texture than a traditional, store-bought, apple pie.
It also results in a different flavor - one that tastes like real, simple, natural ingredients, and isn't over-the-top sweet.
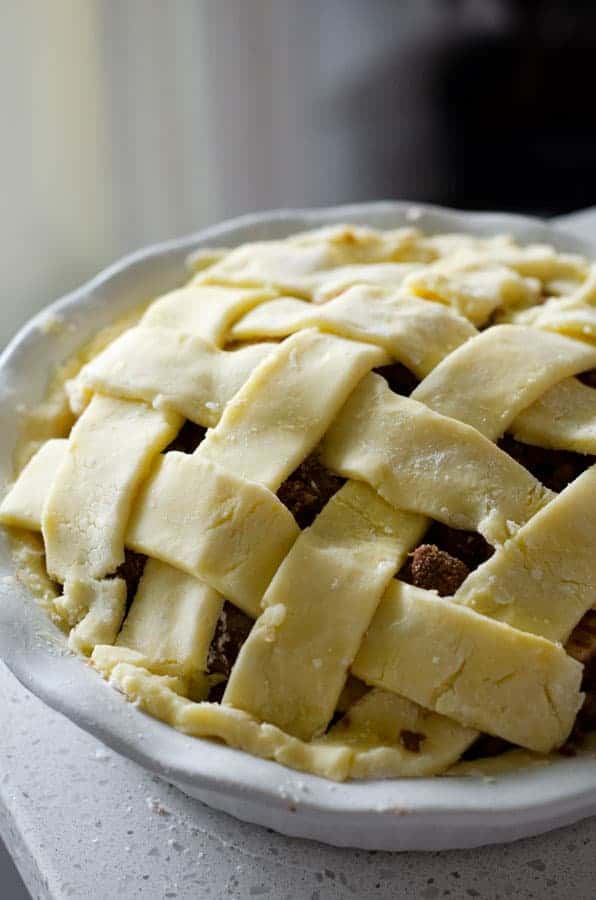
Add your top crust. Look, I attempted a lattice. I think it came out just fine for someone who is not a baker.
I think my dough could have used a bit more water prior to refrigeration, as it was dry in places and you can see it was starting to crack.
I rolled it out, used a pizza cutter to cut strips, and then laid them out in a lattice on top of the pie, pressing the edges together. Is it perfect? No. Is it delicious? Yes.
You can also just roll out the top crust and lay it on top of the apples, and pinch the edges together. just make sure you poke some holes in it or make a few pretty cut outs for heat to escape.
If you don't allow anywhere for the heat and steam to escape, the top crust will puff up like a ballon!
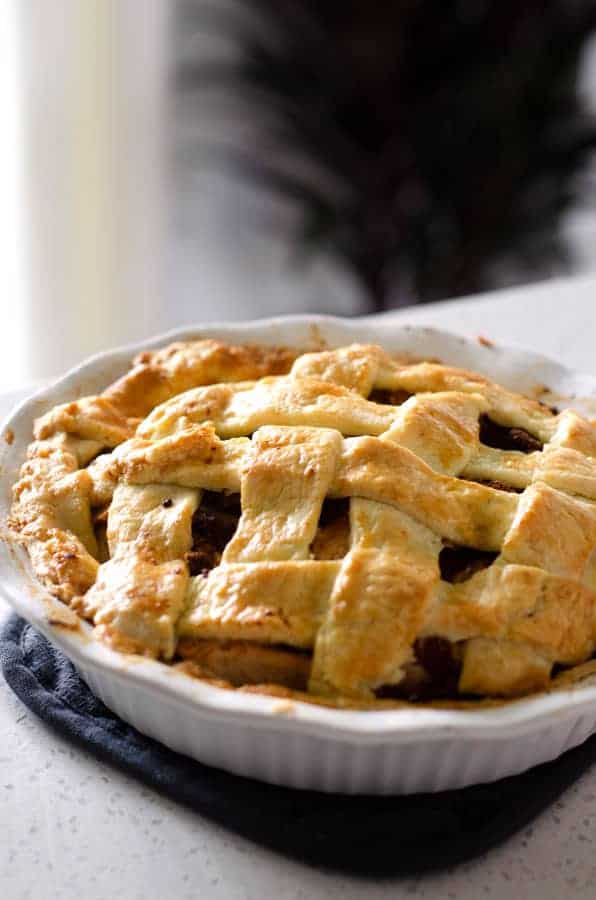
Bake your pie. This gluten free apple pie recipe, if you use the recommended crust mix, will have to bake for a bit longer than your traditional pie crust. The gluten free flour requires a bit more time to cook fully and get browned up.
You're looking for a crispy, golden flaky crust on top.
You may also want to place your pie pan on a baking sheet. This is more commonly done with pies that contain more liquid than this one, as a catch all. That said it can make it easier to get the pie in and out of the oven if you pop it onto a baking sheet. Just personal preference.
Hopefully you preheated your oven temperature to 425°, right?
You're going to bake it at that temp to get a quick bit of high heat on the crust, then we're going to turn the oven down and bake the apples into softness.
It'll need 15 minutes at 425°, and then at least 45 minutes and probably up to 60 minutes (this was me) after reducing the temp to 350°. Just stay close by after 45 minutes and check a few times - you're looking for easily pierced apples and a crisp, brown crust!
Allow to cool. I know, I know...this is the hardest part! But I promise, if you try to cut it hot, it's going to fall apart.
(Well, it's going to fall apart a bit anyway, as is the nature of gluten free baking, but that's ok.)
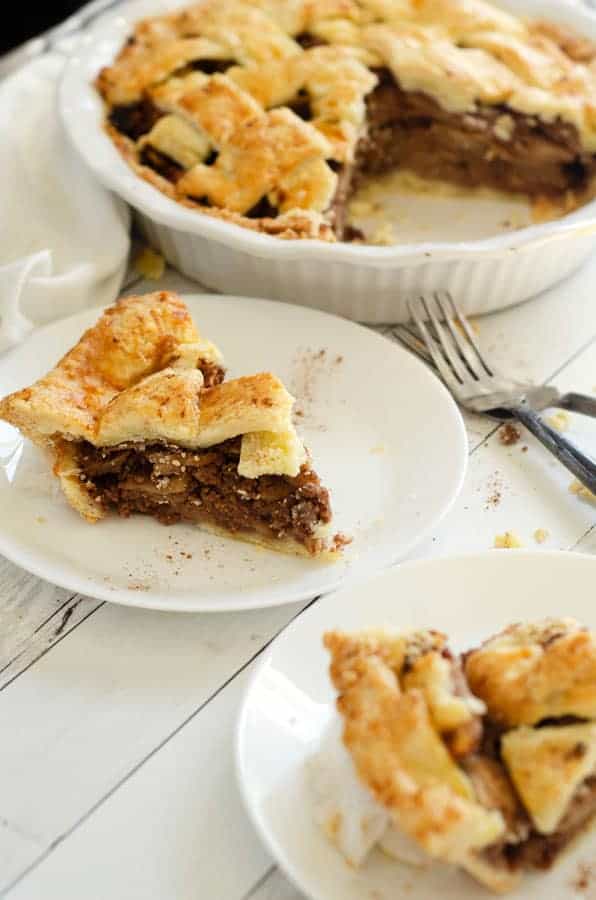
Give it some time to cool, then slice in. You'll find stacks of sweetly coated apples inside a salty, biscuity, pie crust - that no one will be able to tell you pressed in with your fingers.
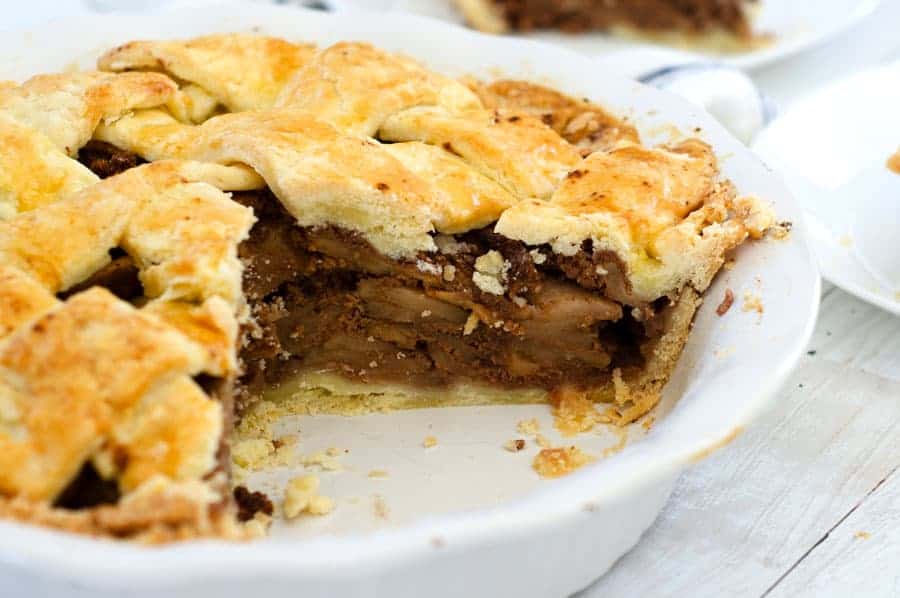
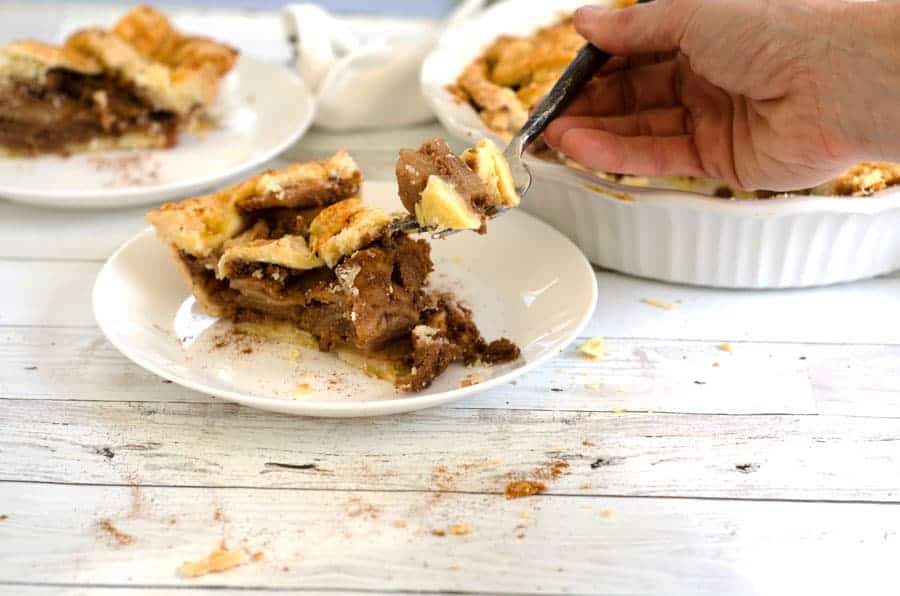
Dig in. Ah, the best part! Grab a fork and taste this gluten free apple pie recipe, getting all the deliciousness and none of the gluten.
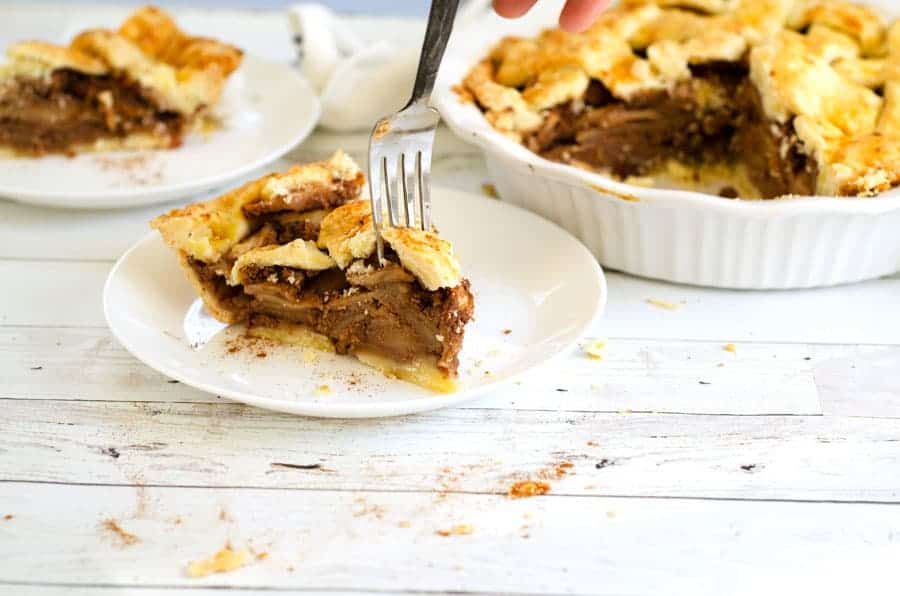
You can serve this gluten free apple pie recipe by itself, for sure.
If you want to step it up a notch, you can serve it with some coconut whipped cream on top, or grab some vanilla ice cream (dairy free if that's your style, it's mine) and add a scoop.
Whether you serve it with anything on the side or not, this is the best apple pie and is sure to be the hit of the table!
Recipe
Gluten Free Apple Pie
This gluten free apple pie recipe has a perfectly flaky, crispy crust and a tender, sweet apple filling that is not sticky or syrupy. Perfect on its own or with a scoop of vanilla ice cream on top!
Ingredients
- 5 large apples
- 1 ⅓ cups date sugar
- 1 teaspoon cinnamon
- ¼ teaspoon salt
- ¼ teaspoon ginger
- ¼ teaspoon cardamom
- ¼ teaspoon allspice
- ¼ teaspoon nutmeg
- 1 package King Arthur Gluten Free Pie Crust Mix
- 16 Tablespoons cold butter
- 4-6 Tablespoons water
Instructions
- Preheat the oven to 425°.
- Core, peel, and slice the apples into thin slices.
- Mix the sugar, salt, and spices in a small bowl, then toss with apple slices to coat and set aside.
- Prep pie crust according to box directions.
- Separate into 2 portions, press into discs, wrap in plastic wrap, and refrigerate for 15 minutes.
- Remove larger disc from fridge and roll out for bottom of pie pan, trimming any excess if needed.
- Remove second disc and roll out.
- Add apple slice mixture to the pie pan.
- Cut the rolled out second disc into slices, then lay them over top of the pie in a lattice formation.
- Bake the pie for 15 minutes, then reduce the oven temperature for 350°.
- Bake for an additional 45-60 minutes or until the top is golden brown and the apples are tender when pierced.
Notes
Apple varieties that work best for this pie are the sweet, firmer ones - think Gala, Fuji, Honeycrisp, or similar.
This recipe calls for date sugar, but you can sub other sweeteners. If you sub coconut or brown sugar, use the same amount. If you use regular refined sugar, reduce the amount to 1 cup.
Keep butter as cold as possible for as long as possible. When the butter gets warm, the dough gets sticky and hard to work with. Only take one disc out a a time, and roll quickly before removing the second disc.
Recommended Products
As an Amazon Associate and member of other affiliate programs, I earn from qualifying purchases, at no additional cost to you. Thank you for your support!
Nutrition Information:
Yield: 8 Serving Size: 1Amount Per Serving: Calories: 369Total Fat: 23gSaturated Fat: 15gTrans Fat: 1gUnsaturated Fat: 7gCholesterol: 61mgSodium: 264mgCarbohydrates: 43gFiber: 4gSugar: 38gProtein: 1g
This post contains affiliate links through the Amazon Affiliate program and others, which allow me to earn a small commission when you purchase through them, at no cost to you. Thanks for your support!


Leave a Reply